


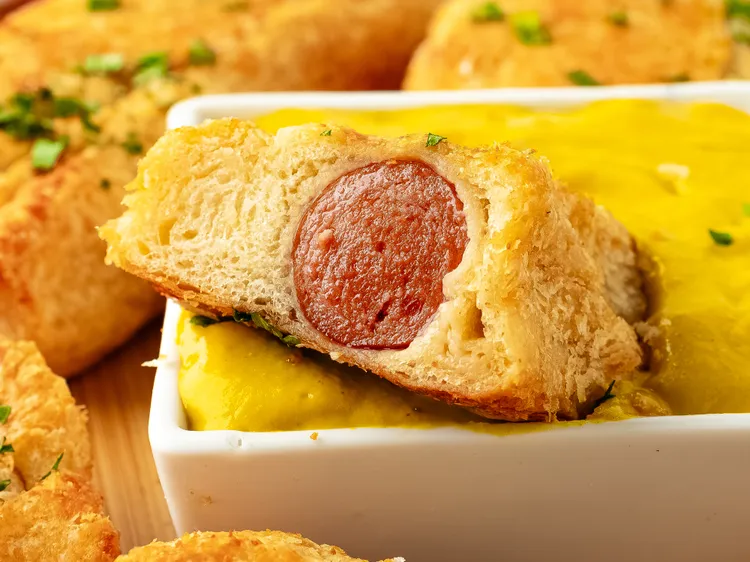
Cute and Easy Hot Dog Brown Bears Recipe
Few culinary creations bridge the gap between whimsical presentation and absolute comfort food quite like Japanese-style bakery breads. If you have ever walked into an Asian bakery, you have likely been charmed by the rows of perfectly golden, pillowy milk breads shaped like animals. Among the most popular variations is the hot dog bread roll—a savory, comforting treat elevated by delightful presentation.
This Hot Dog Brown Bears recipe brings that bakery-style magic straight into your home kitchen. By enveloping premium hot dogs in a rich, buttery, honey-infused yeast dough, we create an adorable “sleeping bear” presentation where the hot dog serves as a cozy blanket. A simple egg wash provides a deep, golden-brown gloss, while black sesame seeds and melted chocolate bring the facial features to life.
Whether you are looking for an engaging weekend baking project, a show-stopping addition to a kid’s birthday party, or a creative twist on classic pigs-in-a-blanket for game day, this recipe delivers. Below, you will find our tested methods, precise measurements, and structural tips to ensure your dough rises beautifully and your bears retain their shape perfectly in the oven.
Ingredients You Will Need
To achieve the signature softness of bakery bread, we rely on a high-protein bread flour and a touch of honey. The fat content from whole milk and unsalted butter softens the gluten structure, ensuring the crumb stays tender for days.
For the Yeast Dough
-
3 cups bread flour (13.5 oz / 380g), plus extra for dusting
-
2 ¼ teaspoons active dry yeast (1 standard packet)
-
¾ cup whole milk (6 fl oz), warmed to 105°F–110°F
-
1 large egg, room temperature
-
3 tablespoons unsalted butter, softened to room temperature
-
2 tablespoons honey (or granulated sugar)
-
1 teaspoon fine sea salt
For the Filling and Decoration
-
8 premium all-beef hot dogs (standard size, thoroughly patted dry)
-
1 large egg + 1 tablespoon water (for the egg wash)
-
16 black sesame seeds (for the eyes)
-
¼ cup dark chocolate chips or brown decorator’s icing (for the snout and mouth)
-
1 tablespoon sliced almonds (optional, for decorative inner ear details)
Step-by-Step Instructions
Baking shaped bread requires patience and attention to structural detail. Follow these chronological steps precisely to avoid dough shrinkage or distorted bear shapes during the baking process.
Step 1: Activate the Yeast
In a small bowl or the bowl of your stand mixer, combine the warmed whole milk (ensure it is between 105°F and 110°F to avoid killing the yeast) and the honey. Stir gently to dissolve. Sprinkle the active dry yeast over the liquid. Let it sit undisturbed for 5 to 7 minutes until a thick, frothy layer forms on the surface.
Step 2: Mix and Knead the Dough
Add the bread flour, egg, and fine sea salt to the yeast mixture. If using a stand mixer, attach the dough hook and mix on low speed until a shaggy dough forms. Gradually add the softened unsalted butter, one tablespoon at a time, allowing it to fully incorporate before adding the next.
Increase the speed to medium and knead for 8 to 10 minutes. The dough is ready when it is smooth, elastic, slightly tacky but not sticky, and pulls cleanly away from the sides of the bowl.
The Windowpane Test: To verify gluten structure, pull a small piece of dough apart gently. If it stretches into a thin, translucent membrane without tearing, it has been kneaded sufficiently.
Step 3: The First Proof
Shape the kneaded dough into a smooth ball. Place it into a lightly oiled bowl, turning once to coat the entire surface of the dough. Cover the bowl tightly with plastic wrap or a damp kitchen towel. Place the bowl in a warm, draft-free area for 60 to 90 minutes, or until the dough has doubled in size.
Step 4: Portion and Shape the Bear Components
Punch down the risen dough gently to release excess air bubbles. Turn it out onto a very lightly floured work surface. Weigh the dough using a kitchen scale for absolute accuracy, then divide it into 8 equal portions for the main bodies (approximately 70g each).
From each of those 8 portions, pinch off three small pieces:
-
Two small pieces (about 3g each) rolled into balls for the ears.
-
One piece (about 5g) rolled into a ball for the snout protrusion.
Cover the portioned dough pieces with a damp cloth to prevent them from drying out as you work.
Step 5: Assemble the Hot Dog Bears
-
Take one large dough portion and roll it out with a rolling pin into a long oval shape, roughly 7 inches long and 3 inches wide.
-
Place a thoroughly dried hot dog lengthwise in the center of the oval.
-
Fold the left and right sides of the dough over the hot dog, pinching the seam tightly to secure it. The dough should wrap around the middle of the hot dog like a blanket, leaving the top half-inch of the hot dog exposed at one end (this exposed part forms the base of the face).
-
Place the wrapped hot dog seam-side down onto a baking sheet lined with parchment paper.
-
Lightly dab the top of the exposed dough head with water. Press the two small ear dough balls onto the top sides of the head. Press the snout dough ball right into the lower center of the face. Repeat for all 8 bears, leaving at least 2 inches of space between each on the tray.
Step 6: Second Proof
Cover the assembled bears loosely with a sheet of greased plastic wrap. Allow them to rise a second time for 25 to 30 minutes. They should puff up visually but still look taut. While they undergo their final rise, preheat your oven to 350°F (175°C).
Step 7: Egg Wash and Bake
Whisk the remaining egg with one tablespoon of water until perfectly smooth. Using a pastry brush, gently glaze the dough surfaces of each bear, taking care not to let the egg wash pool at the base.
Carefully press two black sesame seeds into the head dough above the snout to create the eyes. Place the baking sheet on the center rack of the preheated oven and bake at 350°F for 18 to 22 minutes. The bread should turn a deep, golden-brown color, and the hot dogs should be slightly plumped. Transfer the bears to a wire rack to cool completely before decorating.
Step 8: Final Decorative Details
Place the dark chocolate chips in a microwave-safe bowl and heat in 15-second intervals, stirring in between, until completely melted. Transfer the melted chocolate to a small piping bag or a toothpick. Pipe a small button nose onto the center of the raised dough snout, along with a tiny “Y” shape to form the mouth. Allow the chocolate to set completely before serving.
Expert Tips & Variations
-
Dry the Hot Dogs Completely: Hot dogs are packed in brine. If you do not dry them thoroughly with paper towels before wrapping them in dough, the residual moisture will create steam pockets, causing the dough to unravel and separate in the oven.
-
Securing the Ears: Dough expands significantly during the baking process. Ensure you press the ear and snout pieces firmly into the main head dough. A light dab of water acts as a glue; skipping this step may cause the ears to detach as the bread rises.
-
The Puff Pastry Shortcut: If you are short on time and cannot make a yeast dough from scratch, you can substitute store-bought refrigerated puff pastry or crescent dough sheet. Cut the pastry into strips, wrap the hot dogs, and use excess pastry scraps to shape your bear features. Note that puff pastry will yield a flakier, lighter texture rather than a soft, chewy bakery bun texture.
Ingredient Substitution Options
| Original Ingredient | Best Alternative | Resulting Texture / Flavor |
| Bread Flour | All-Purpose Flour | Slightly less chewy; softer, delicate crumb structure. |
| Whole Milk | Oat Milk (Unsweetened) | Excellent dairy-free swap; maintains rich browning. |
| All-Beef Hot Dogs | Turkey or Veggie Dogs | Lighter flavor profile; ensure veggie dogs are well-dried. |
| Honey | Light Brown Sugar | Adds a subtle caramel undertone to the dough development. |
Serving Suggestions
These hot dog brown bears are best served warm or at room temperature within a few hours of baking.
-
The Dipping Board: Serve them alongside small ramekins of classic yellow mustard, sweet pickle relish, smokey barbecue sauce, or honey mustard dip.
-
The Complete Meal: Pair these savory pastry bears with a light, crisp garden salad dressed in a bright vinaigrette, or alongside sweet potato fries and crunchy apple slices for a balanced lunch.
Storage & Make-Ahead Notes
Refrigeration
Store any completely cooled leftover hot dog bears in an airtight container lined with a paper towel to absorb ambient moisture. They will keep well in the refrigerator for up to 4 days.
Freezing
To freeze, wrap each fully baked and decorated bear tightly in plastic wrap, then place them altogether in a heavy-duty freezer bag. They can be frozen for up to 2 months. Thaw overnight in the refrigerator before reheating.
Reheating Instructions
-
Oven/Toaster Oven (Recommended): Place the bears on a baking sheet, cover loosely with aluminum foil to protect the chocolate decoration from burning, and heat at 320°F (160°C) for 8 to 10 minutes until warmed through to the center.
-
Air Fryer: Heat at 300°F (150°C) for 4 to 5 minutes for a quick method that restores the crisp exterior of the bun.
Nutrition Information
Estimation per individual Hot Dog Brown Bear serving
-
Calories: 365 kcal
-
Protein: 13g
-
Fat: 16g
-
Saturated Fat: 7g
-
Carbohydrates: 41g
-
Fiber: 2g
-
Sugar: 6g
-
Sodium: 680mg